Saturday, February 9, 2013

Disney Villains Varnish Nail Polish Swatch and Review

I have mixed feelings about this set. I am glad I found it on sale. I paid about $12.00 on the Disney site. It comes with six colors in all. If your a huge Disney buff then snatch these up!
Cruella De Vil
Evil Queen
Maleficent
Mother Gothel
Queen of Hearts
Ursula


Pros:
The colors are actually really great! Unique in some aspects
The brush is very long
There is .5 fl oz (Normal)
I love the packaging

Cons:
Not all were a consistent coverage.
Streaking
The formula was quite thick
The brush may be long but it was also thin.
I had to work with the polish to get an even look. Even needing to redo some nails to get a good picture.

On to the pictures...


Cruella De Vil
Coral Red

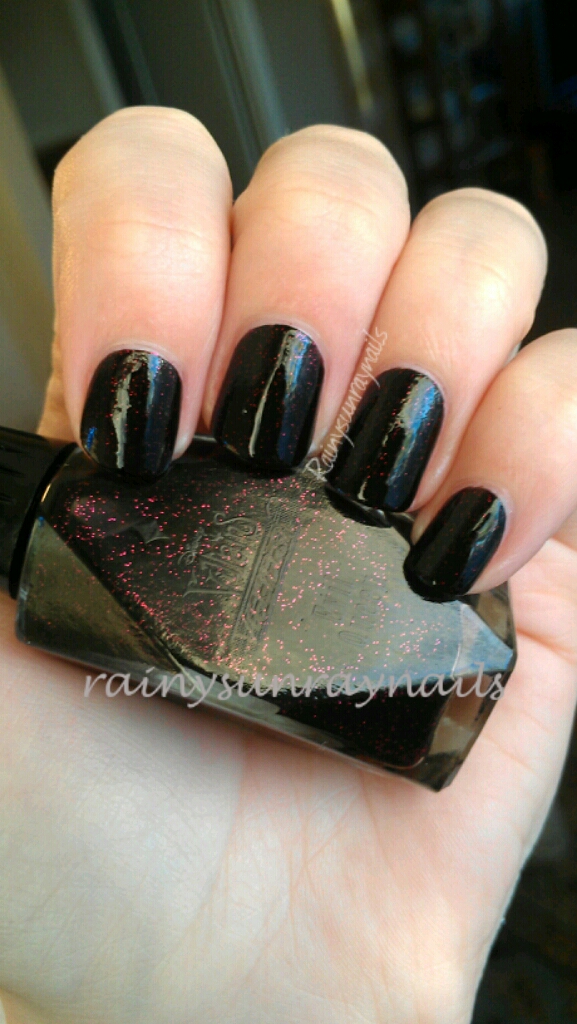
Evil Queen
Black base with lots of purple glitter.


Maleficent
This is a color shifter. Greens and turquoise.

Mother Gothel
If your looking for that perfect blood color, this is it!
The picture shows this on the brown side. In person its closer to a very blood red.


Queen of Hearts
This looks like crushed up gold flakes. 

Ursula
This is also a color changer. Light pinks and purple depending on the light. Very shimmer


Simple Heart Design and New Indie Polish!

This is a very easy heart design anyone can do.
The Indie polish is from http://www.enchantedpolish.com/products
I am so amazed at the depth of color change in this polish! The swatches are to coats and three different angle to show you just how many color changes this beauty does!


Get this look.
Take a strip of tape. Stick it to your skin a couple times before folding it in half and cutting out your half heart. If your careful, you can reuse the same piece for each nail.


Thursday, February 7, 2013

Hallmark Valentines Card Inspired Nail Art Collab with BeautybyKrystal

I love to do nail art collaborations with my cousin Krystal. And this time she had such a cool idea for Valentines.
Hallmark Valentines card inspired! Such a cute idea.
Beauty By Krystal

 To see Krystal's Hallmark inspired pictorial click HERE!!!


So, off I went to shop for a card for my guy.  It didn't take long at all. This one stood out right away.


I started with a basic red on my thumb and ring finger then added a red shimmer.
For the rest of the nails I painted them an off white and also added a shimmer white top coat.


I then used some black nail tape across the nail to create a french tip. This can also be done with a stripe write black polish or black polish and art brush.
Then with acrylic paint and fine art brush I started creating the filigree design. Mixing black and white until I got the right grey.
I went back into the white and added more detail.

Go back and trim off the tape.

Create a heart, with red acrylic paint, over the middle of the black stripe.


Then I outlined the heart with a thin black line. And then dotted some more shimmer red polish to the heart.

Seal in this manicure with a thick top coat.


When I had this nail design on, my guy said they were his favorite design I have done yet. I just smiled and said thank you. He hasn't seen his card yet.....

Happy Valentines Day Lovelies! 


Tuesday, February 5, 2013

Conversation Hearts Nail Art


These conversation hearts have been around for so many years. They are a staple during valentines day. This manicure is easy with a very cute outcome!

Find pastel polish colors similar to the heart candy. I also used my trusty black stripe write.
I also use matte for my look. But, it is not necessary. For the lettering I used acrylic paint. Red polish works just as well.

Take your stripe write or black polish and fine art brush and follow these steps on each nail.


Next write in the heart sayings. Pick whatever you wish to write.You could even get silly with it.


Next seal in these steps with a top coat.


I then went back in with an art brush and matte finish just in the hearts. The candy hearts are a matte finish.


Happy Valentines Day!