Sunday, December 30, 2012

New Years Manicures!!!

This last week I had the pleasure to give out awesome manicures to family when visiting for the holiday. So, here are some of those manicures along with one of my own.


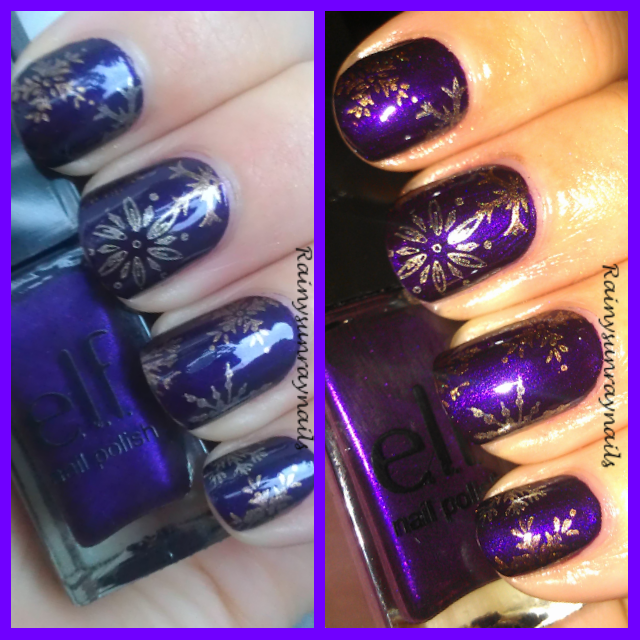
This first one was done on my cousin Krystal. She also blogged about this design. You can find her awesome post about it thru this link.beautybykrystal

This manicure started out very simple and 2 hours later we had this! It was so much fun playing around with stamps and different techniques. We got a little carried away. But the outcome is fantastic!
For all products used for this manicure click on the link to Krystal's blog.


Next is my sister in laws nails. She new she wanted to use Finger Paints Santa's Magic. So that went on all fingers but the ring and thumb. On those we put Orly in Miss Conduct. I then stamped a kiss on the ring fingers from a konad plate and added 2013 with my stripe write in black.
 
 
The blurred picture on the right shows just how holographic and sparkly the nails are.
 
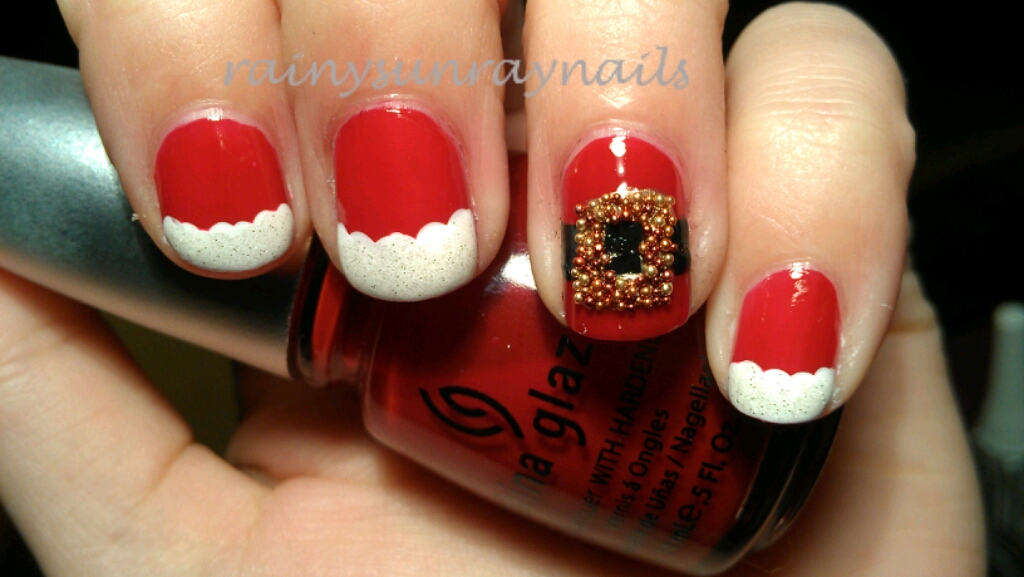
And finally I did this design a few weeks back for a contest on Istagram. The theme was celebration. I was voted first place! It was so cool! They are great for New Years as well.
I just used Sally Hansen Hard as Nails in white for the base. Black and white acrylic paint and fine art brush to create the champagne bottle and glasses. Then added some glitter accents.


Happy New Year!


Sunday, December 23, 2012

Holiday Caviar Manicures (Micro Beads)

These are two designs I did this month. I love the way they turned out!
Now, if you decide to do these designs, keep in mind that they are time consuming.


Lets start with this one. Snow flake caviar. The base color is from Orly called Sweet Peacock. I then went in with white acrylic paint and added a snow flake on the ring finger. To see the step by step howto for the snow flake click here.
Add a top coat to seal in the snowflake and color. I then took silver micro beads and one by one,with a dotting tool and a very little bit of clear coat on the tool, placed the beads on the snowflake as seen in the picture. If the clear coat starts to dry making it difficult for the beads to stick, add a little more clear to the snowflake with a tooth pick or dotting tool. And don't forget random beads on the other nails to look like falling snow.
Because I used silver beads for this design,I was able to add a fast drying top coat to seal this design in. But, depending on the micro beads, some colors tend to bleed when doing so.
 
Now, onto the Peppermint Caviar Manicure
The base for these are Sally Hansen Hard as Nails in White. Then A coat of Frosty from China Glaze.
I also used acrylic paint and fine art brush to create the red swirl. Very simple,just a red color. I added a top coat to all the nails to seal in the swirl.
Now, this one is more time consuming then the snowflake. I took my dotting tool and one stripe at a time, added non fast drying clear coat, then added the beads in that area. White beads in the white swirl and red beads in the red swirl. Pushing lightly down when finished to ensure they are secure.
DO NOT add a top coat to the beads if they bleed. I happened to have beads that do bleed.
 
Hope you try these out! Completely worth the time and effort. If you have any questions please feel free to ask in the comments below. Thanks for looking!
 

Saturday, December 22, 2012

Mistletoe Manicure (Pucker Up!)


Who will you be kissing under the mistletoe? Well, with this design you can kiss anyone you wish!
For these I used acrylic paint,and a fine art brush. Both can be purchased at any craft store for a very good price. No need to get expensive paint.
 
If you don't have the right color you would like, just do some mixing on your pallet.
 
 
The base is a basic red with a little glitter on the thumb and ring finger. If your fingers don't line up like mine do, feel free to pick another finger your thumb lines up with or just do the whole design on your ring finger.
 
With your basic green, create the mistletoe. The lighter the stroke the better.
 
 
Next go back into your pallet and create a dark green for some shadowing and depth. Outline the mistletoe with the dark green.
 
Then with a dotting tool and white polish or acrylic paint, create the cluster of flowers.
 
 
Then with gold polish make a thick line where the twine would be around the mistletoe stems.
 
 
Go back into the black paint and outline the gold to resemble twine like the picture.
 
 
I added micro beads to the flowers,but this is not necessary.
 
On the remaining fingers I used white base and some glitter as well. Then, stamped then with kiss designs.
 
 
Seal in your design with a nice thick top coat. My goto top coat for nail art is SecheVite.
 
 
Now go kiss someone!


Wednesday, December 12, 2012

Stamped Snowflakes Manicure (Cheeky Plate)

I have been a little obsessed with my new holiday Cheeky plate.Specifically the snowflakes. I would say that only about 75% of the stamps on this plate are use able. I am pretty sure this plate is one of there first made. I love Cheeky plates! I wanted this only for the snowflakes anyway. And at least they stamp beautifully. So here are some manicures with the snowflake stamp. Each snowflake is one stamp.Some are my nails and some are family or clients.


Which one is your favorite?

Thursday, December 6, 2012

Nail of the Day

Base is elf in Violet Velvet. This color is from the holiday cube out last month. For swatches of all the polishes in that collection click  here
Stamped with Cheeky plate (Holiday Plate) with Copper and Gold

Natural light on the left. But, the right is closer to the correct color of this beautiful purple.

Wednesday, December 5, 2012

Rudolph Abstract Manicure

Just a quick Howto. I did these last weekend and posted them on instagram. Now I am sharing the tutorial with you all!
The base is Sally Hansen Hard as Nails.
The I used black acrylic paint and a fine art brush.
I added the red gem with clear coat.
And last, sealed it in with a nice thick top coat.


Sunday, December 2, 2012

Simple Snowflake Manicure

Snowflakes can sometimes seem intimidating.But ,the truth is they are very simple, there is just many steps. So if you have the patience, you can do this!
I looked up some pictures of different snowflakes and just went off of those pictures.
I also used acrylic paint and a fine art brush. You can do this with polish, but I find that you can get thinner more Precise lines with acrylic or even a stripe write polish.
Before I started my snowflake I did a sponged base for more depth. Feel free to skip this step and just put a base color of what you like.


I added some frosty polish onto the snowflake. And a couple dots.
 Then add a nice thick top coat to seel in the snowflake.


Thursday, November 29, 2012

Santa's Big Red Suit 3D Manicure

Decided to go ahead and do another picture video tutorial. People seemed to enjoy them.
Who doesn't love Santa's big red suit? Its one of the things that makes Santa, Santa. Well, I have been big into the flocking manicure, and thought of this as one of my Christmas designs 2 months ago.
The great thing about this manicure is you can have a very simple,but cute manicure just by stopping before you add the 3D effects. So, everyone can do this!
I hope you love this as much as I did creating it!


No 3D
 
Only micro beads on the ring finger.
 
Full 3D effect
 
Close up
 
Happy Holidays!!!