I'm actually not a big fan of the snake skin pattern. But I know many are. Which I can understand. Its a beautiful pattern. I just cant pull it off. I love the way this turned out. They look real! Enjoy!
Start off with one coat of any nude.
Then take a makeup sponge and randomly place a copper, light brown and the same nude, on the sponge.
Lightly sponge onto the nail. It will give the background some depth when stamping.
Don't bother to clean your cuticles yet.
Next Take a dark brown and black. Place one stroke of each color onto the image. Then scrape about 3 times until blended well.
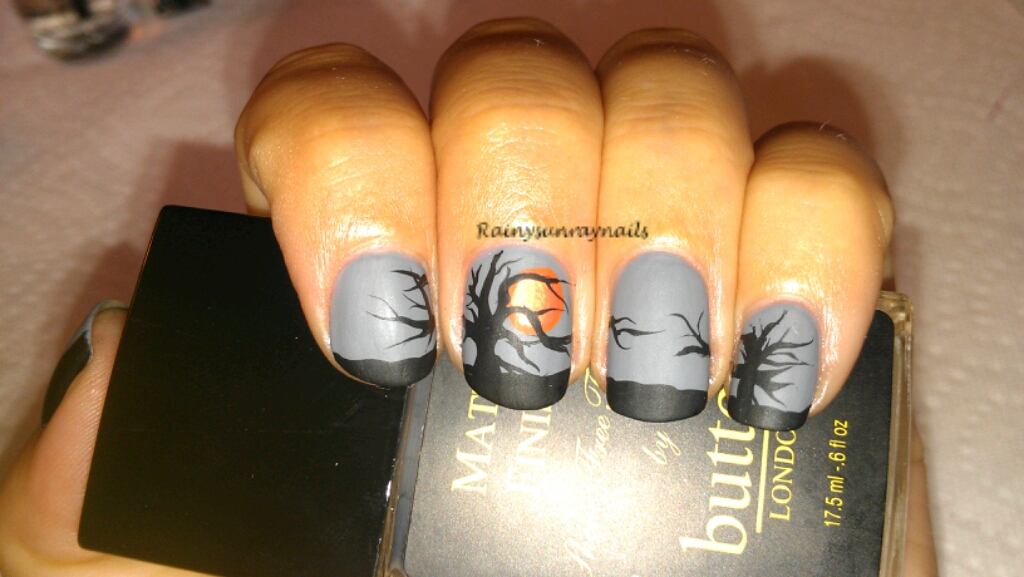
I saw this picture online and decided this would make a really nice fall nail. And the best part is that its so easy! Hope you try it out!
Start off with a lighter shade of grey. Here I used Loreal in Greycian Goddess 560. Two coats.
Next take a stripe polish in black or you can use a fine brush and any black polish. Paint an almost messy like french tip on all your fingers except your thumb. Paint the thumb the way you see in the picture below.
Next grab an orange. I used two different oranges just to create some depth in the sun. I really wanted the sun to pop. For my oranges I chose OPI in Chopsticking to my Story and China Glaze in Thataway. With a dotting tool or a tooth pick, create a circle on your middle or ring finger.
Now comes the fun part! Create a tree with the same black. What I love about this is that it can be so organic. Put two, three or even four trees if you wish! Just be sure to not cover the sun to much. Have the sun peeking thru your spooky trees. I painted three trees and had them climbing onto other nails.
Now be sure to use a really nice thick top coat. I used Seche Vite. I then decided to see how the Matte finish would look. I have to say, the matte is quite spooky!
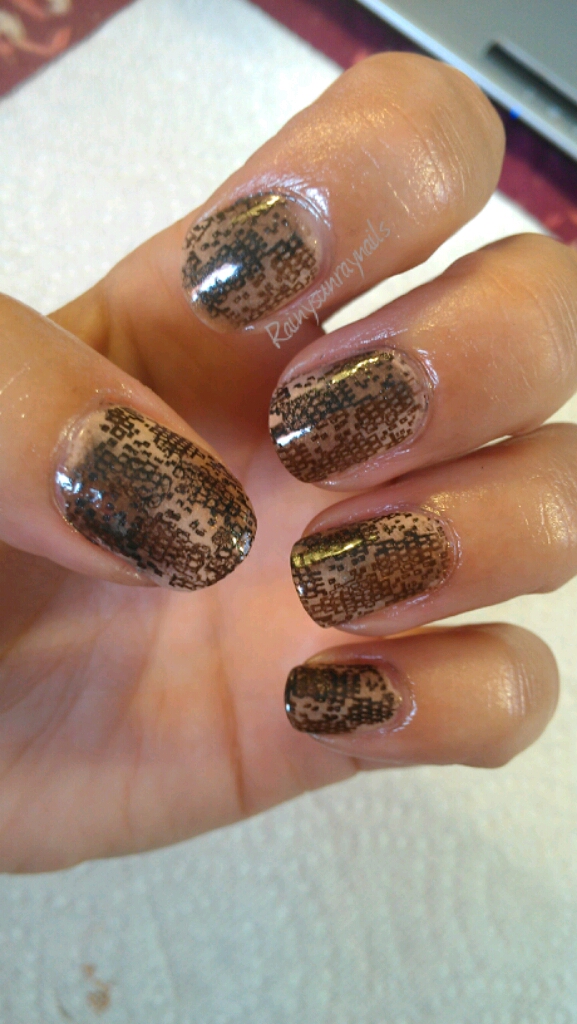
Fall is approaching quickly. So, what better way to say" hello" to fall then with a paisley manicure? I don't know about everyones summer. But ours, here in the Northwest, was about 2 weeks long. So, I am looking forward to the change.
Base color is Sally Hansen Complete Manicure in Malt
I then stamped with O.P.I. Chopsticking to my Story, ChinaGlaze Dress Me Up, and Essie Little Brown Dress.
I have 2 different finishes here. One is just a nice thick clear coat of Seche Vite and the other is a Matte finish from butter London. I included pictures of both.
Matte Glossy
2 coats of the S.H. Malt. I have found when using S.H. complete manicure, I don't need a clear base coat of any kind. This line holds up very nicely.
From Cheeky Plate I. Any of the smaller paisley are great. This works beautifully with any small stamp as well. Start with the darkest color.
Randomly place on the nails. Place some halfway off the nail also.
Repeat with the other colors. Its ok if they overlap.
Next take a qtip and polish remover and clean the edges.
If you're not familiar with this game, and you enjoy board games, you should certainly look into it! This description will be short. But I do have to say that it is my all time favorite game. I even have it on my phone. So, for all you Catan nerds out there, this is for you!!!!
Lets trade!
For more Nail Art or Howtos Visit these other Links
Micheal's sells bags of real feathers for very cheap. I paid $2.99 each as shown in the picture. I'm sure any craft store sells them. Feathers are very trendy right now. Whether its clipped onto the hair or on a pair of earrings. They seemed to be everywhere! So why not on the nails?
The first set is very bright and my tribute to the last bit of summer.
Then I did a feathered nail that could be worn in the Fall months.
I can't decide which design I like more. Which do you prefer?
My Howto Video for this Manicure.
For this I chose to paint my nail neon pink. In order to get the true brightness of a neon, paint your nail white first, Then go over in the neon color. Let the color dry completely.
Next take a clear coat. Do one nail at a time. Place one coat of clear on the nail. While the polish is still wet, place the feather on top of the nail. With a tooth pick or your finger, gently press the feather to the nail. Move on to the next nail and leave the feather to dry. After finishing your last nail, go back to your fist nail and cut the remaining feather around the shape of your nail. If some feather comes off in the process its ok. It will still look great!
After trimming all the feathers add a really good thick top coat. I did 3 coats of the clear. It just looks so much better with that many coats. But put on as many as you like.
Even after a few coats, there still may be some areas that are raised or just not smooth. That's normal. If you're someone who picks at your nails often, this might not be the mani for you. But the outcome is just beautiful!