Thursday, November 29, 2012

Santa's Big Red Suit 3D Manicure

Decided to go ahead and do another picture video tutorial. People seemed to enjoy them.
Who doesn't love Santa's big red suit? Its one of the things that makes Santa, Santa. Well, I have been big into the flocking manicure, and thought of this as one of my Christmas designs 2 months ago.
The great thing about this manicure is you can have a very simple,but cute manicure just by stopping before you add the 3D effects. So, everyone can do this!
I hope you love this as much as I did creating it!


No 3D
 
Only micro beads on the ring finger.
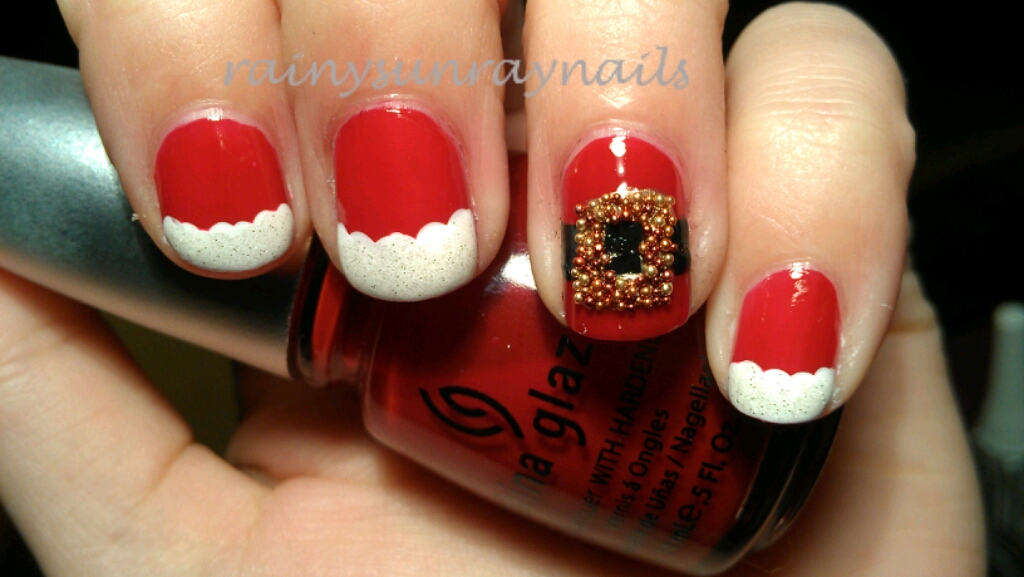
 
Full 3D effect
 
Close up
 
Happy Holidays!!!


Monday, November 26, 2012

Inspirational Nails. Can Owls Keep Time?

I purchased this neckless 2 month ago. It has become my favorite piece of jewelry.So as I was looking thru my nail polishes, China Glaze in Agro was a perfect match to create some inspiration nails based off of the neckless.
The details were done with acyclic paint and fine art brush. Then sealed with Seche Vite.


Snowy Branches Manicure

This technique has flocking in the steps. It makes the snow look real.
 
 Start off with a base. I used Orly in SnowCone
 
 Next sponge two coats of another blue and silver. I used Orly in Gumdrop and Sinful Colors in Casablanca.
 
Clean up around the edges.
 
Next start creating your branches. Start at your thumb and work your way thru your nails while connecting the branches. I used a fine art brush and Essie in Little Brown Dress.
Next use the same art brush and white or just a stripe polish. Add snow to the top of the branches.
 
 
I then added a frosty polish to the white. You could also use a fine glitter.
 
 
Add a top coat to seal in the steps you have taken.Let dry completely.
Then with a clean fine tip brush,use a non fast dry clear coat. Painting one nail at a time,go over the  white. While its still wet, sprinkle on the flocking. Move onto the next nail while that sets.
When your done with the last nail, lightly brush off the flocking with a fan brush.


 DO NOT add a top coat after flocking.
Thats it!


Tuesday, November 20, 2012

Fall Nail Art Collection

Still undecided about what your Thanksgiving Manicure will be? Here is my fall nail art collection.
Some have howtos and others are just designs you may find inspiration from.
Happy Thanksgiving to you all!

First this is leaves made from glitter.
http://rainysunraysnails.blogspot.com/2012/09/fall-leaf-manicure-fall-2012.html


Next is one of my favorites. Fall leaves on a branch thru each nail.
 
 
Retro Fall nails
 
 
Some Sun Flowers
 
 
Paisley
 
 
Fall Poppy
 
 
Changing Leaves
 
My moms nails.


Thursday, November 15, 2012

How-to Cork Board. (unrelated nail art)


I was at a wine tasting establishment near my house recently and I asked the owner if he had extra corks that he would like to part with. He gave me a big box full! I new exactly what I wanted to do with them. I even had many cork board designs in my head already. I have made a few but never thought to post any of them. Well, today is the day. As it so happens, my cousin Krystal was talking about wanting a cork board for her new beauty area/office space. I piped right up and said I would make her one! And it also so happens that we will be visiting the family for Christmas this year. So I will get to deliver this to her myself!
This is fun,easy and relaxing.
You will need:
A hot glue gun
Any frame will do as long as the backing is intact.
A sharp knife or utility blade and cutting board
And as many corks as you can find. (Try your local grocery store or wine store)


Start by placing your design on the board before you start gluing. Just make sure every cork is where you want it. You may need to make different cuts in the cork depending on your design.
Once your satisfied with your placement,begin to glue each piece down.
 Continue to do this process.


You may need to make odd cuts to help the design look finished.


Want to learn how I did this Seahawks cork board?  Follow this link

I hope you try this! If you do, send me a picture of your finished board to me!